There’s something about a cookie bursting with nuts and sweet cherries that just screams holiday magic. This Christmas Nut Cherry Cookies Recipe is one of those cozy classics that’s both nostalgic and delightfully chewy, perfect for munching while sipping hot cocoa. I’m excited to share how easy and rewarding these cookies are to bake!

Jump to:
Why You'll Love This Recipe
This Christmas Nut Cherry Cookies Recipe has a way of wrapping you in the warm, festive aromas of Christmas morning. I love how the crunchy nuts pair with those chewy candied cherries—each bite feels like a celebration. Plus, it’s so simple to make even on a busy holiday weekend!
- Perfect Holiday Flavor: The combination of nuts and cherries captures that classic Christmas cookie vibe.
- Simple Ingredients: You probably have most of these staples sitting in your pantry already.
- Easy Prep and Bake: Minimal fuss with rolling and chilling dough means you get to enjoy them sooner.
- Great Make-Ahead Option: Dough chills well, so you can prepare it in advance and bake fresh when guests arrive.
Ingredients & Why They Work
The magic of this Christmas Nut Cherry Cookies Recipe really lies in the balance of buttery richness, nutty crunch, and bursts of chewy sweetness. Each ingredient plays its part to create that perfect holiday cookie experience.
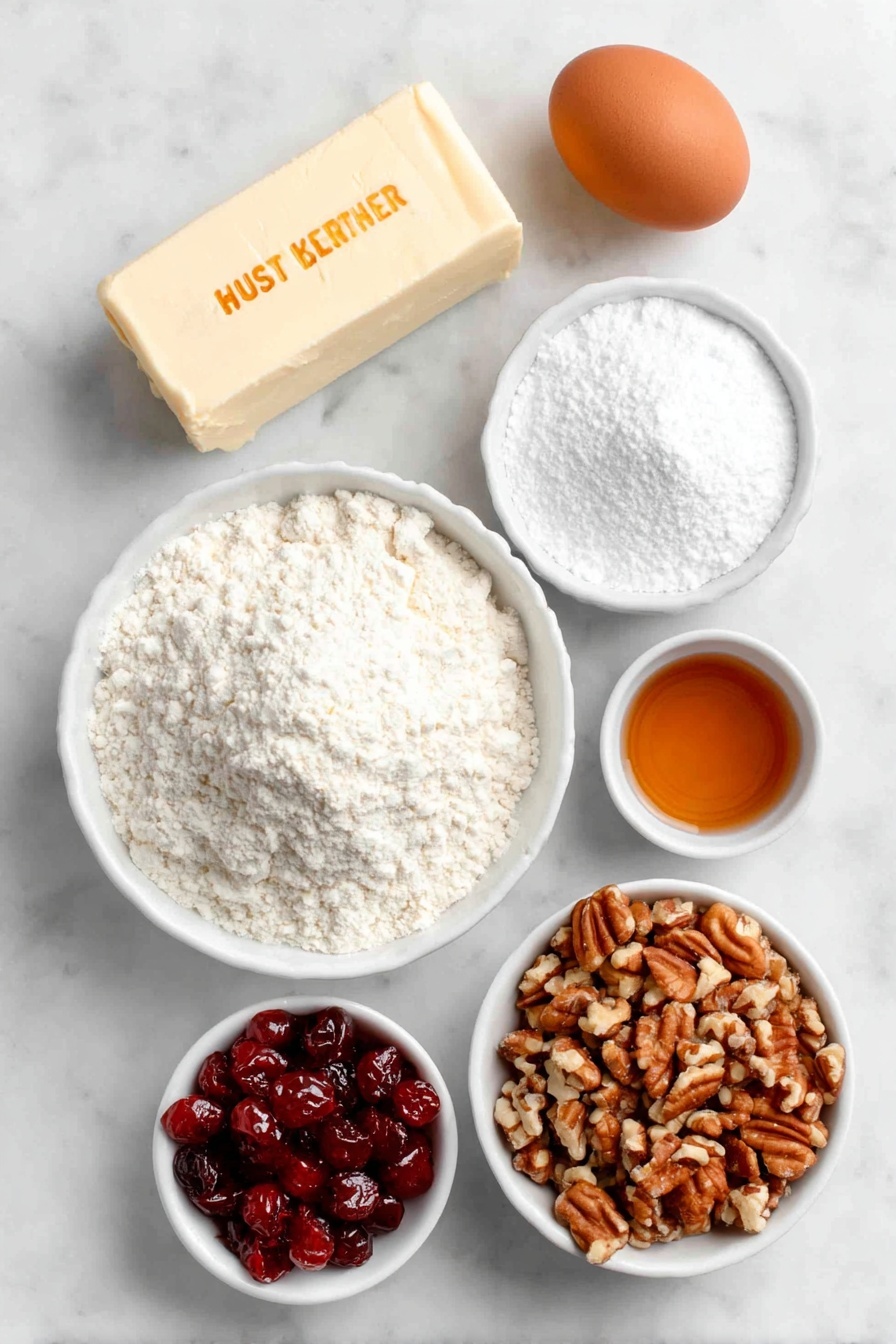
- Butter: Makes the cookies rich and tender; I recommend using unsalted so you can control the saltiness.
- Powdered Sugar: Creates a smooth, melt-in-your-mouth sweetness that feels more delicate than granulated sugar.
- Egg: Binds the dough and adds moisture, helping everything stick together perfectly.
- Vanilla Extract: Adds warmth and enhances the other flavors; I always reach for pure vanilla for the best taste.
- All-Purpose Flour: Forms the cookie’s structure—too much and they get dry, so measure carefully.
- Chopped Nuts: Provides crunch and that classic festive texture, walnuts or pecans work beautifully here.
- Candied Cherries: The star of the show—these give bursts of fruity sweetness that contrast the nutty flavors perfectly.
Make It Your Way
One of the best things about this Christmas Nut Cherry Cookies Recipe is how easy it is to tweak depending on what you love or have on hand. I've tried a few variations and they all turned out great, so feel free to experiment a bit!
- Variation: Swapping candied cherries for dried cranberries gave the cookies a tart twist that I really enjoyed one year when cherries were out of stock.
- Nut Alternatives: Pecans add a buttery richness, while almonds provide a nice subtle crunch—try whichever you prefer or have leftover!
- Gluten-Free Option: I’ve swapped the regular flour with a gluten-free blend and the cookies still held together well, just watch the texture as it can be a bit softer.
Step-by-Step: How I Make Christmas Nut Cherry Cookies Recipe
Step 1: Cream the Butter and Sugar
Start by beating the butter and powdered sugar together until the mixture looks fluffy and light. I like using a stand mixer for this, but a good hand mixer works just fine. Make sure to scrape down the sides so everything blends evenly. This step creates a great base for tender cookies.
Step 2: Add Egg and Vanilla
Next, crack in the egg and pour in the vanilla extract, then mix thoroughly. The dough will start to come together here—don’t rush; you want a smooth, even blend without overmixing.
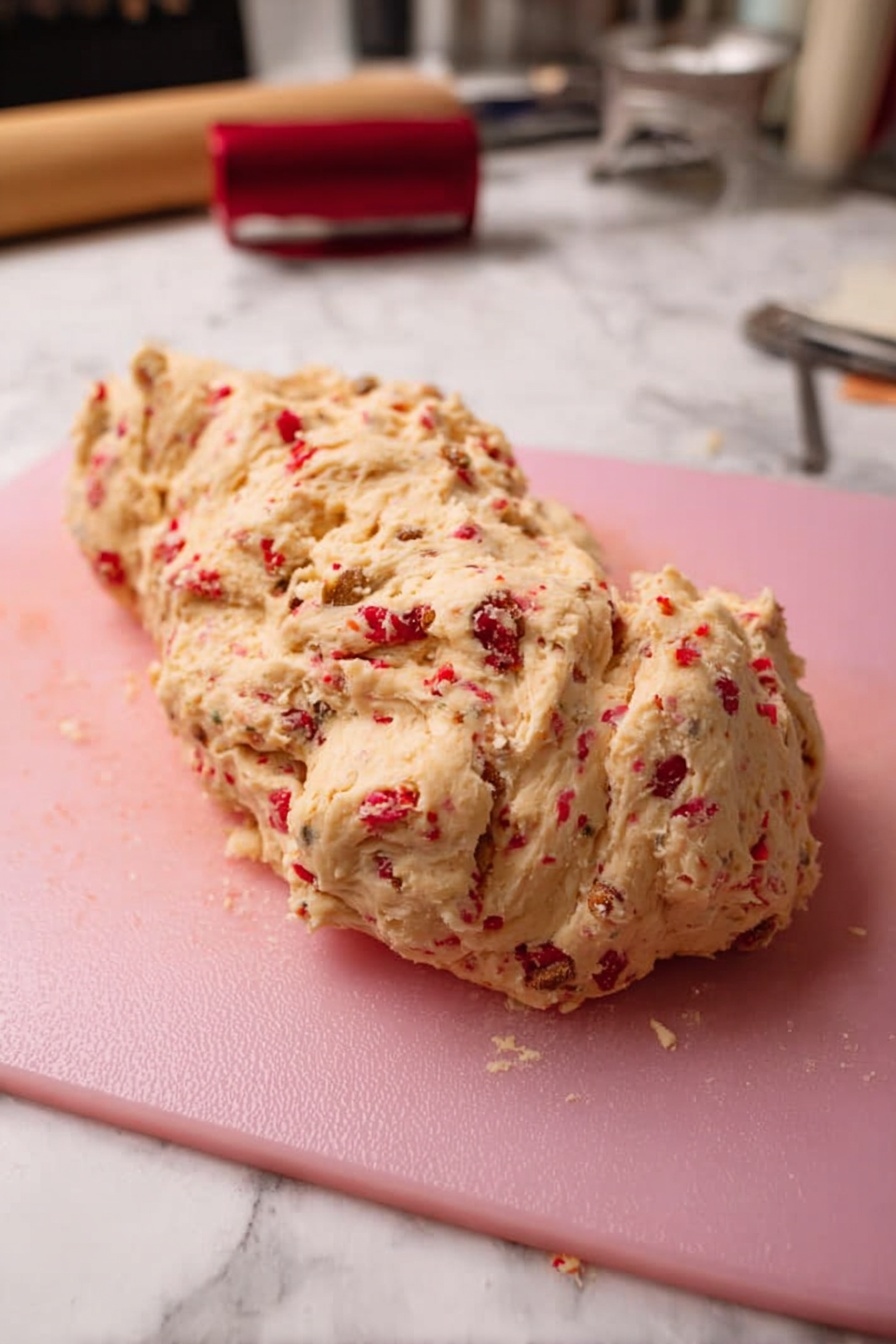
Step 3: Fold in the Flour, Nuts, and Cherries
Using the lowest mixer speed, gradually add the flour, followed by the chopped nuts and candied cherries. Mixing just until combined keeps the cookies tender and ensures those cherries stay nicely distributed.
Step 4: Chill the Dough
Roll your dough into two logs, about 2 inches in diameter, then wrap them tightly in plastic wrap. Pop them in the refrigerator for at least an hour. I find that chilling makes it so much easier to slice thin, perfect cookies without things turning squishy.
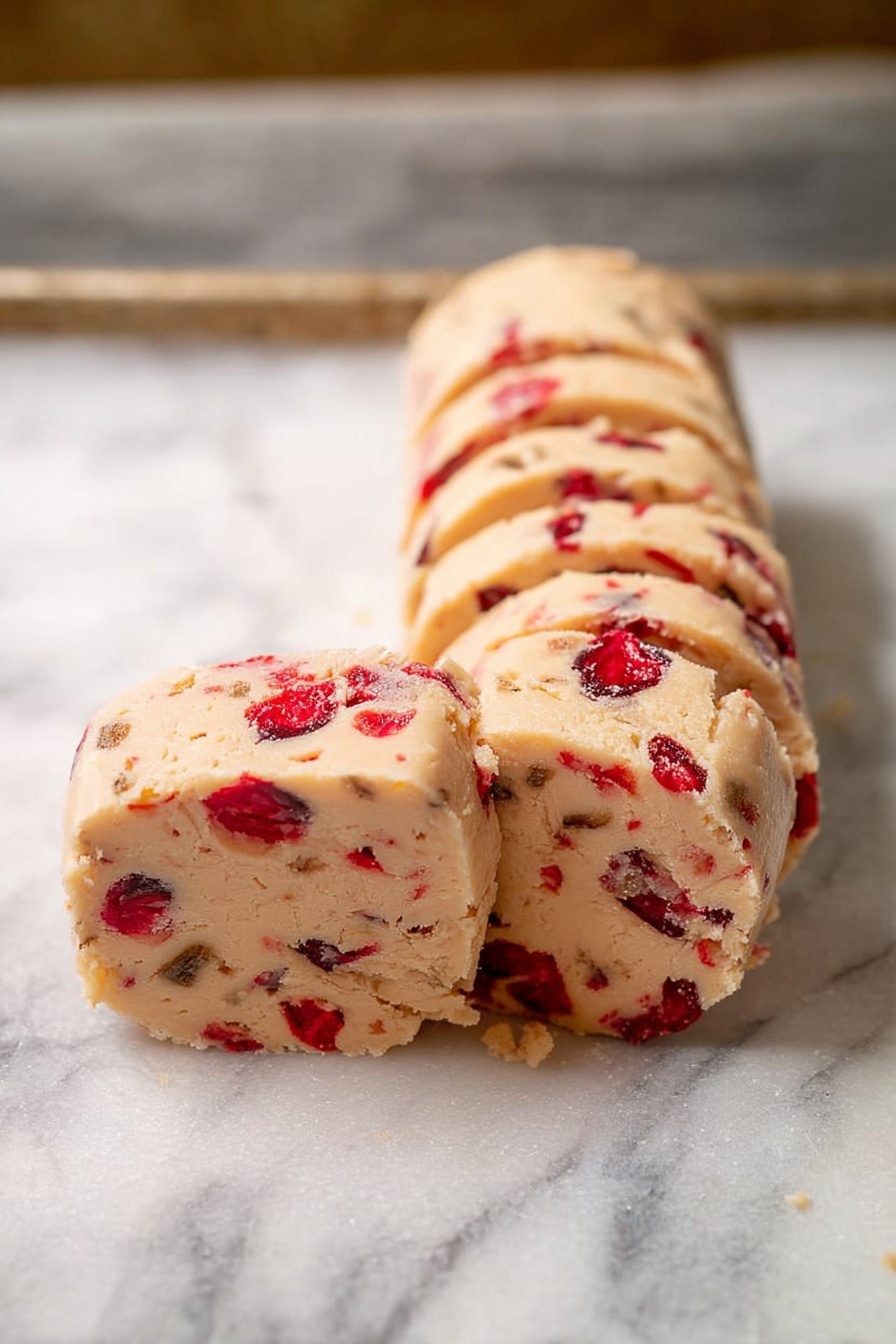
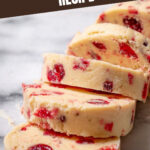
Step 5: Slice and Bake
Preheat your oven to 325°F. Unwrap the chilled logs and slice into ¼-inch thick rounds. Place them spaced evenly on a baking sheet lined with parchment paper. Bake for about 13-15 minutes until the edges are just set and show the faintest golden color. Don’t overbake — they should remain soft and chewy!
Top Tip
Through baking these cookies a dozen times, I’ve picked up a few crucial tips that help get that perfect texture and flavor every single batch, so I want to share them with you.
- Thin Slices Matter: Cutting the dough into even, thin slices makes sure the cookies bake evenly and come out delightfully chewy rather than doughy or too crisp.
- Don’t Skip Chilling: Chilling firms up the dough, which helps the slices hold their shape while baking — it’s a small step that makes a big difference.
- Room Temperature Ingredients: Letting the butter and egg come to room temp before mixing helps everything combine smoother, avoiding clumps.
- Watch Your Oven Time: Ovens vary, so start checking around 12 minutes to catch that perfect barely-golden edge before overbaking saps their softness.
How to Serve Christmas Nut Cherry Cookies Recipe
Garnishes
I usually keep these cookies beautifully simple, but sometimes I dust them lightly with powdered sugar for a snowy effect. Occasionally, I'll chop a few extra nuts and sprinkle them on top before baking for a little festive crunch and sparkle.
Side Dishes
These cookies pair wonderfully with a hot cup of spiced tea or rich coffee. During holiday gatherings, I like setting them out with a cheese board and fresh fruit — it balances the sweetness and makes for an inviting snack table.
Creative Ways to Present
One year, I arranged these cookies in a festive wreath shape on a large platter, adding sprigs of rosemary and cranberries to complete the look. It made such a charming centerpiece for our cookie exchange! Wrapping small stacks in festive parchment paper tied with twine also makes for a lovely homemade gift.
Make Ahead and Storage
Storing Leftovers
I store leftover Christmas Nut Cherry Cookies in an airtight container at room temperature. They generally stay fresh and chewy for up to a week, though I can never resist eating them all much sooner!
Freezing
To freeze, I slice the dough logs in advance and freeze them flat on a baking sheet, then transfer to a zip-top bag. When ready to bake, just pop slices straight from the freezer on a lined baking tray and add a couple extra minutes to bake time. This method saves so much last-minute prep stress!
Reheating
If I have leftovers that have softened a bit, I warm them in a 300°F oven for just 5 minutes to bring back that fresh-baked snap and aroma. It’s like reviving a little holiday magic on demand.
Frequently Asked Questions:
Fresh cherries have a lot of moisture, which can affect the cookie dough consistency and baking results. Candied cherries are drier and provide the right sweetness and texture for this recipe, so it’s best to stick with those.
You can refrigerate the dough logs for up to 24 hours before slicing and baking. Just be sure they’re tightly wrapped to prevent drying out and to keep the flavors fresh.
Absolutely! Just skip the nuts and consider adding extra cherries or even some mini chocolate chips to balance the texture and flavor.
I find a sharp, serrated knife works best for slicing without squashing the dough. Chill the logs thoroughly beforehand to ensure clean slices.
Final Thoughts
This Christmas Nut Cherry Cookies Recipe holds a special place in my heart every holiday season. Each batch brings back warm memories and fills the house with a scent that says “celebrate.” I hope you’ll give these a try—they’re endlessly festive, surprisingly simple, and absolutely delicious. Trust me, once you make them, they’ll be a new holiday tradition in your kitchen, just like they are in mine.
Print
Christmas Nut Cherry Cookies Recipe
- Prep Time: 10 minutes
- Cook Time: 15 minutes
- Total Time: 1 hour 25 minutes
- Yield: 36 cookies
- Category: Dessert
- Method: Baking
- Cuisine: American
Description
Ann Roger's Christmas Cookies are a delightful holiday treat featuring buttery dough studded with chopped nuts and colorful candied cherries. These cookies are easy to prepare and perfect for sharing during festive gatherings.
Ingredients
Cookie Dough
- 1 cup (2 sticks) butter
- 1 cup powdered sugar
- 1 egg
- 1 teaspoon vanilla
- 2 ¼ cups all-purpose flour
- 1 cup chopped nuts
- 2 cups candied cherries
Instructions
- Cream Butter and Sugar: Cream together butter and powdered sugar until light and fluffy, ensuring they are thoroughly combined.
- Add Egg and Vanilla: Mix in the egg and vanilla extract thoroughly into the creamed butter and sugar mixture.
- Incorporate Dry Ingredients: On low speed, slowly add the all-purpose flour, chopped nuts, and candied cherries, mixing just until the dough comes together. Avoid over-mixing.
- Shape and Chill Dough: Roll the dough into two logs, each wrapped tightly in plastic wrap, and refrigerate for 1 hour to firm up.
- Preheat Oven: When ready to bake, preheat your oven to 325°F (163°C).
- Slice Dough: Slice the chilled dough logs into rounds about ¼-inch thick and place them spaced on a baking sheet lined with parchment paper or a non-stick surface.
- Bake Cookies: Bake in the preheated oven for 15 minutes or until the edges have set and the cookies are just barely golden.
- Cool and Serve: Remove the cookies from the oven and allow them to cool on the baking sheet for a few minutes before transferring to a wire rack to cool completely. Enjoy your festive cookies!
Notes
- Use cold butter to achieve the best texture when creaming with sugar.
- Chilling the dough logs makes slicing easier and helps cookies hold their shape during baking.
- Feel free to substitute the chopped nuts with your favorite nuts such as pecans or almonds.
- Store the cookies in an airtight container to maintain freshness for up to one week.
- If candied cherries are not preferred, dried cranberries or raisins can be used as alternatives.
Nutrition
- Serving Size: 1 cookie
- Calories: 150 kcal
- Sugar: 10 g
- Sodium: 50 mg
- Fat: 9 g
- Saturated Fat: 5 g
- Unsaturated Fat: 3 g
- Trans Fat: 0 g
- Carbohydrates: 17 g
- Fiber: 1 g
- Protein: 2 g
- Cholesterol: 30 mg


Leave a Reply